How to Crochet: A Guide for Complete Beginners
Welcome to the fascinating world of crochet! I’m so glad that you are here as a part of your path to becoming a skilled crocheter. This guide will bring you up to speed on the basics of crocheting.
Crochet is a learnable skill that anyone can master, but remember that you will need some practice before it becomes second nature. Take one step at a time and you will soon be ready to take on any crochet challenge!
(Note: This guide uses US crochet terms to define the stitches and techniques. See US/Canadian vs. UK/Australian Crochet Terms for a quick reference guide to the differences.)
What materials do I need to start crocheting?
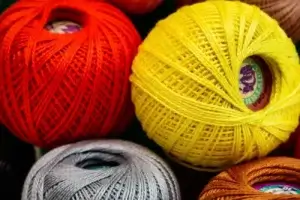
To begin crocheting, you will need a crochet hook and yarn. You don’t need to invest in an expensive set of
It is also handy to have a pair of scissors for cutting the yarn when you have completed a sample or project.
If you decide that you want to invest more into crochet as a hobby, some other supplies that make crochet projects easier are: more crochet hooks in a wider range of sizes, a ruler or tape measure, yarn needles or tapestry needles, stitch markers, and a project bag to hold your supplies.
How to hold a crochet hook
First of all, a crocheter must learn how to hold the crochet hook in a way that will be comfortable and effective.
Begin by holding the hook in your dominant hand (the right if you are right-handed, or the left if you are left-handed). There are two basic techniques for holding a crochet hook: the pencil grip or the knife grip.
Pencil Grip
- In this style, you will hold your hook in the same manner as holding a pencil or pen. Hold the crochet hook by placing your hand underneath the hook and placing your thumb and index finger on the thumb rest.
Knife Grip
- For this method, you will hold the crochet hook in the same way that you would hold a butter knife. Place your hand over the top of the hook and grip the thumb rest with your thumb and index finger. The shaft of the hook will rest lightly in your palm or on the tips of your other fingers.

How to hold the yarn when crocheting
While crocheting, you will hold the working yarn with your non-dominant hand as it unravels from the skein or ball of yarn. To add the correct amount of tension to the yarn as you make your stitches, it helps to weave the yarn in between your fingers or even to wrap the yarn around one or more of your fingers. The tension should be even and not too tight or too loose. Experiment and see which way is best for you to balance even tension and keep your hands comfortable.
Attaching the yarn to the hook with a slip knot
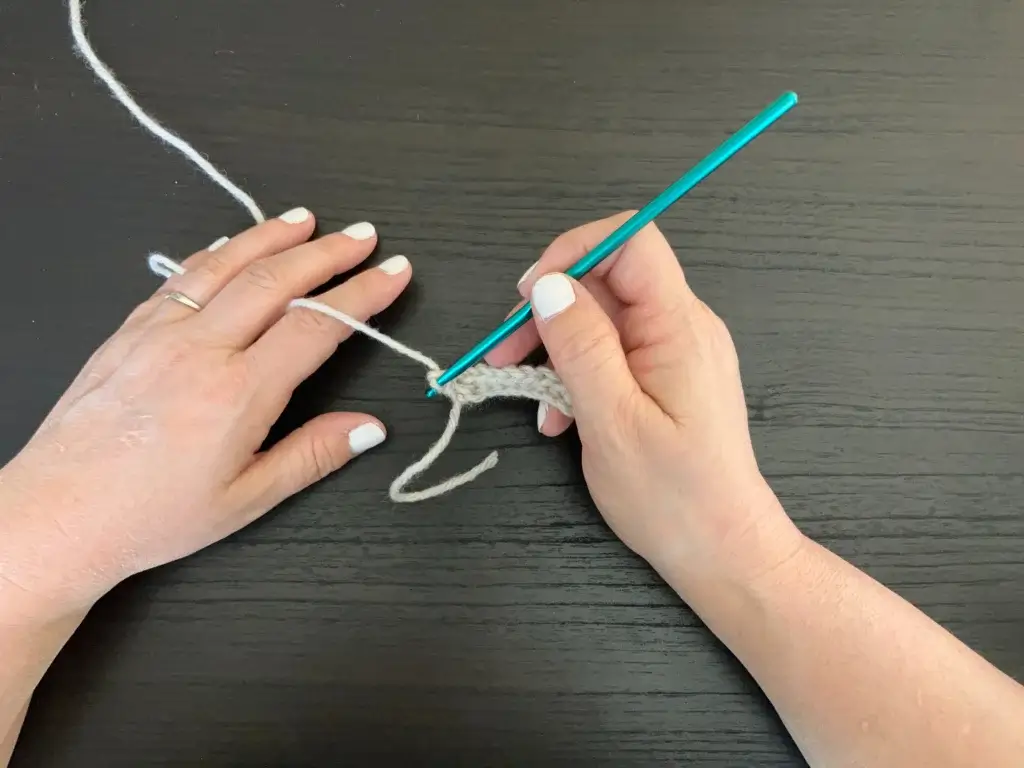
Step 1: Hold the yarn in your left hand, with the working end of the yarn (the longer end that is coming from the ball of yarn or skein) on your left and the tail end (shorter end) to the right. Hold the crochet hook in your right hand. (Reverse these instructions if you are left-handed.) Make a loop with the longer end of the yarn crossing over on top of the shorter end.
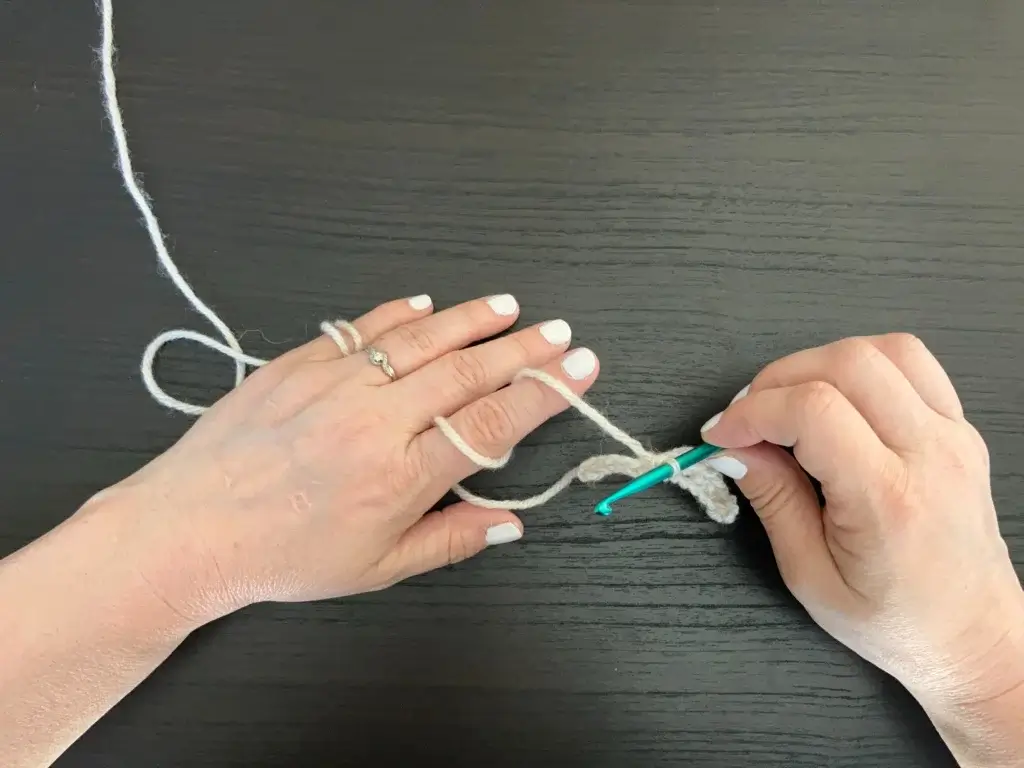
Step 2: Pinch the loop at the spot where the strands cross. Insert the crochet hook into the loop from front to back.
Step 3: Use the hook to grab the strand of the working end and pull it through the loop.
Step 4: Pull on the yarn ends to tighten and secure the slip knot on the crochet hook.
You are now ready to begin crocheting!
For more detailed information, check out Beginner Crochet: How to Begin a Project with a Slip Knot.
Counting your crochet stitches
When you look closely at your completed stitches, you will see that the two strands of yarn on the top of the stitch form a “v” shape. To count your stitches, count each “v” in the row or round. Do not count the loop of yarn that is on the crochet hook.
Another way to count stitches is to identify the “post” of the stitch and count each of these.
Basic crochet stitches
These six stitches form the basis for projects of all kinds, from the most simple to the most complex. Read on for step-by-step instructions!
Chain stitch
After placing the yarn on your hook with a slip knot, you will now have one loop of yarn on the hook.
Holding the base of the slip knot lightly in place with the fingers of your non-dominant hand, wrap the working yarn over the hook from front to back. Grab the yarn with the hook and pull the yarn through the loop on the hook once. You have now made a chain stitch!
Repeat the process as many times as needed to create a length of chain stitches. A row of chain stitches is a common way to form the foundation of a crochet project.
How to work into crochet chain stitches
To create more crochet stitches after you complete a starting chain, you will begin by inserting your hook into one chain stitch at least two chains away from the hook. Take a look at a completed chain stitch. You will see that there are three strands that make up the stitch – two strands at the top that form a “v” shape, and one strand at the bottom (sometimes called the “bump”). You may insert your hook underneath any of these strands – which one will depend on the instructions of a pattern you are using or your own personal preference.
Some options for working into the chain stitch are: underneath the top two strands (the “v”); underneath the bottom third strand (the “bump”); underneath one of the top strands and the bottom strand; or under any one of the three strands. Each option will create a different look and feel to the visible edge of the first row of your work. I personally like the polished look that results from working into the “bump” as it leaves the “v” stitches visible on the edge.
Single Crochet (UK Double Crochet)
To make a single crochet stitch, begin with a chain of any number. You will place the first single crochet stitch into the second chain from the hook.
Insert your hook into the stitch indicated and wrap the working yarn over your hook, then pull through. You will now have two loops on your hook. Wrap the yarn over the hook and pull through both loops on the hook. You have now completed a single crochet stitch! Keep going and place a single crochet in each stitch until the end of the row.
To make another row, make one chain stitch and turn your work. (The chains at the beginning of a new row are called the “turning chain“.)
Working into each stitch of the previous row, repeat the steps for making a single crochet stitch. Make as many rows as you wish to complete a practice sample.
Half double crochet (UK half treble)
To make a half double crochet stitch, begin with a chain of any number. You will place the first half double crochet into the third chain from the hook.
Wrap the working yarn over your hook once and insert your hook the indicated stitch. Wrap the yarn over your hook and pull through. You will now have three loops on your hook. Wrap the yarn over the hook once and pull through all three loops on the hook. You have now completed a half double crochet stitch! Keep going and place a half double crochet in each stitch until the end of the row.
To make another row, make two chain stitches and turn your work.(The chains at the beginning of a new row are called the “turning chain“.)
Working into each stitch of the previous row, repeat the steps for making a half double crochet stitch. Make as many rows as you wish to complete a practice sample.
Double crochet (UK treble)
To make a double crochet stitch, begin with a chain of any number. You will place the first double crochet stitch into the fourth chain from the hook.
Wrap the working yarn over the hook once and insert your hook into the indicated stitch. Wrap the yarn over your hook and pull through. You will now have three loops on your hook. Wrap the yarn over the hook once and pull through two loops. There will now be two loops still remaining on the hook. Wrap the yarn over the hook once more and pull through both of the remaining loops on the hook. You have now completed a double crochet stitch! Keep going and place a double crochet in each stitch until the end of the row.
To make another row, make three chain stitches and turn your work. (The chains at the beginning of a new row are called the “turning chain“.)
Working into each stitch of the previous row, repeat the steps for making a double crochet stitch. Make as many rows as you wish to complete a practice sample.
Treble crochet (UK double treble)
To make a treble (or triple) crochet stitch, begin with a chain of any number. You will place the first triple crochet stitch into the fifth chain from the hook.
Wrap the working yarn over the hook twice and insert your hook into the indicated stitch. Wrap the yarn over your hook once and pull through. You will now have four loops on your hook. Wrap the yarn over the hook once and pull through two loops. There will now be three loops still remaining on the hook. Wrap the yarn over the hook and pull through two loops. There will be two loops remaining on your hook. Wrap the yarn over the hook once more and pull through both of the remaining loops on the hook. You have now completed a triple crochet stitch! Keep going and place a triple crochet in each stitch until the end of the row.
To make another row, make four chain stitches and turn your work. (The chains at the beginning of a new row are called the “turning chain“.)
Working into each stitch of the previous row, repeat the steps for making a triple crochet stitch. Make as many rows as you wish to complete a practice sample.
Slip stitch
To make a slip stitch, insert your hook into the stitch indicated and wrap the working yarn around the hook once. Pull the yarn through – there will be two loops on the hook. Use your hook to pull the loop that was just created through the first loop on the hook. You have now completed a slip stitch!
How to finish a crochet project
To complete your crochet project, pull up the yarn of your last completed stitch to create a tail of about 6 inches and use scissors to cut the yarn. Pull this tail the rest of the way through the completed stitch and tighten. Use your hook or a tapestry needle to weave the tail securely back through the finished piece.
Weave in any other yarn ends. You may want to “block” the project by dampening it and pinning it to a foam mat or towel until it dries into the shape you like.
Next steps and more resources for learning to crochet
Take the next step in your crochet journey by learning more about yarn, crochet hooks & other tools, crochet terms, abbreviations, and patterns.
And take the time to explore other resources, techniques, and projects. There are endless possibilities when it comes to crochet, and the more you learn, the more you’ll be able to create. Happy crocheting!